Classic Banana Pudding with Nilla Wafers
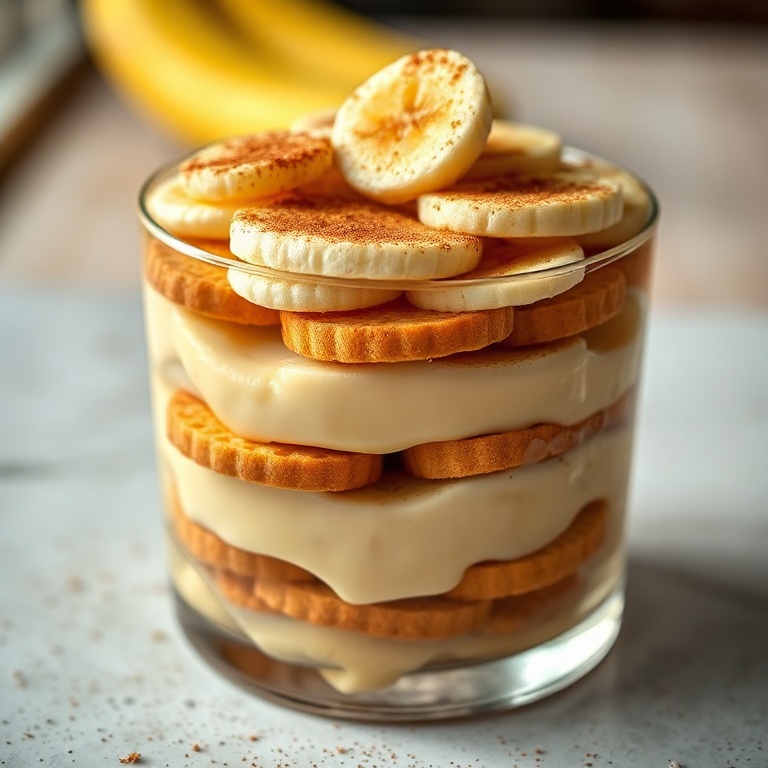
Classic Banana Pudding is a creamy, crowd-pleasing dessert that everyone loves. Making it from scratch is easier than you think. After making this many times, I know the best way to keep it thick and creamy. The layers are perfectly soft and rich. Try this recipe with my family’s favorite vegan sushi bowls. If you love recipes like this, you’ll also enjoy Easy Vegan Sushi Bowls and Refreshment Peach Watermelon Salad.
Why This Classic Banana Pudding with Nilla Wafers Is Pure Comfort
- Creamy layers that melt in your mouth
- Perfect for any occasion
- Easy to make ahead
- Sweet and nostalgic flavor
What You'll Need for Classic Banana Pudding with Nilla Wafers
Choosing the right ingredients makes a big difference, but this recipe is forgiving enough to work with what you have.
- 4 ripe bananas
- 12 ounces Nilla wafers
- 3 cups milk
- 1 box instant vanilla pudding mix
- 1 cup heavy cream
- 1 tablespoon vanilla extract
- 1 teaspoon ground cinnamon
- 1 teaspoon salt
- 1/4 teaspoon nutmeg
- Optional: Whipped cream
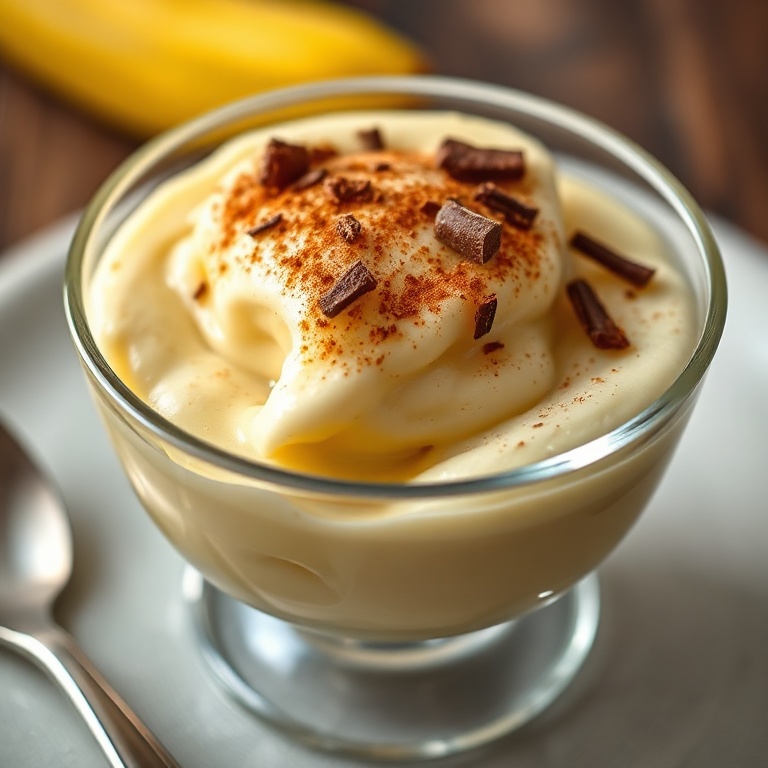
- Optional: Chocolate shavings
- Optional: Sprinkles
- Optional: Chopped nuts

📝 Ingredient Notes
- Ripe bananas: Choose bananas with brown spots for maximum sweetness.
- Nilla wafers: Use regular or gluten-free versions depending on dietary needs.
- Milk: Whole milk gives the best texture, but 2% works too.
🛒 Tools & Equipment I Recommend
- Stand Mixer — Mixes pudding and cream evenly without lumps. → See on Amazon
- Glass serving dish — Shows off the layers and keeps the pudding cool. → See on Amazon
How to Make Classic Banana Pudding with Nilla Wafers
- Step 1: Mash the bananas in a large bowl until smooth.
- Step 2: Add milk, pudding mix, vanilla extract, cinnamon, salt, and nutmeg. Mix well.
- Step 3: Fold in the heavy cream until smooth and thick.
- Step 4: In a 9×13-inch dish, layer the Nilla wafers and banana pudding.
- Step 5: Repeat layers and refrigerate for at least 4 hours before serving.
Cook's Tips for Perfect Classic Banana Pudding with Nilla Wafers
- Best technique: Make sure the bananas are well mashed and the pudding is not too runny.
- Common mistake and fix: If the pudding is too thin, let it sit in the fridge longer to thicken.
- Serving suggestion: Top with whipped cream and a sprinkle of cinnamon for extra flavor.
- Storage tip: Store in an airtight container in the fridge for up to 3 days.
Storing & Reheating Classic Banana Pudding with Nilla Wafers
Short-Term Storage
Store in an airtight container in the fridge. Store in an airtight container in the fridge for up to 3 days. Make-ahead tip: Make up to 2 days in advance and refrigerate.
Freezing Classic Banana Pudding with Nilla Wafers
Freeze for up to 1 month in an airtight container.
How to Reheat Without Drying It Out
Oven: Thaw in the fridge and reheat in the oven at 350°F for 10 minutes. Microwave: Thaw in the fridge and reheat in the microwave for 30 seconds.
Recipe Notes
- Chef tip: Use a large bowl for mixing to avoid overmixing and keep the texture smooth.
- Best substitution: Replace heavy cream with coconut milk for a dairy-free option.
- Make-ahead: Prepare the day before and let it set in the fridge for best results.
- Scaling: Double the recipe for a larger crowd and use a larger bowl.
- Troubleshooting: If the pudding is too thick, add a splash of milk to adjust the consistency.
Want to level up this recipe?
Silicon spatula — Helps mix and fold ingredients without sticking. → Check price on Amazon
Classic Banana Pudding with Nilla Wafers
Ingredients
Main Ingredients
- 4 ripe bananas
- 12 ounces Nilla wafers
- 3 cups milk
- 1 box instant vanilla pudding mix
- 1 cup heavy cream
- 1 tablespoon vanilla extract
Seasonings
- 1 teaspoon ground cinnamon
- 1 teaspoon salt
- 1/4 teaspoon nutmeg
Optional Toppings
- Whipped cream
- Chocolate shavings
- Sprinkles
- Chopped nuts
Instructions
- Step 1: Mash the bananas in a large bowl until smooth.
- Step 2: Add milk, pudding mix, vanilla extract, cinnamon, salt, and nutmeg. Mix well.
- Step 3: Fold in the heavy cream until smooth and thick.
- Step 4: In a 9×13-inch dish, layer the Nilla wafers and banana pudding.
- Step 5: Repeat layers and refrigerate for at least 4 hours before serving.
Notes
- Chef tip: Use a large bowl for mixing to avoid overmixing and keep the texture smooth.
- Best substitution: Replace heavy cream with coconut milk for a dairy-free option.
- Make-ahead: Prepare the day before and let it set in the fridge for best results.
- Scaling: Double the recipe for a larger crowd and use a larger bowl.
- Troubleshooting: If the pudding is too thick, add a splash of milk to adjust the consistency.
Storage
- Fridge: Store in an airtight container in the fridge for up to 3 days.
- Freezer: Freeze for up to 1 month in an airtight container.
- Oven reheat: Thaw in the fridge and reheat in the oven at 350°F for 10 minutes.
- Microwave reheat: Thaw in the fridge and reheat in the microwave for 30 seconds.
- Make ahead: Make up to 2 days in advance and refrigerate.
Nutrition Per Serving
- Calories: 320
- Protein: 5g
- Fat: 12g
- Carbs: 42g
- Fiber: 2g
- Sugar: 22g
- Sodium: 120mg
- Cholesterol: 30mg
- Sat. Fat: 6g
Nutritional values are estimates only. Actual values may vary by brand and portion size.
Classic Banana Pudding with Nilla Wafers FAQs
Yes, prepare it up to 2 days in advance and refrigerate for best results.
If the pudding is too thin, let it sit in the fridge longer to thicken. You can also add more pudding mix if needed.
Yes, freeze for up to 1 month in an airtight container. Thaw in the fridge before serving.
Yes, you can use graham crackers or chocolate wafers instead of Nilla wafers.
Graham crackers or any crispy cookie work well as a substitute for Nilla wafers.
A Warm Final Note
I can’t wait for you to try Classic Banana Pudding with Nilla Wafers and see how effortlessly it comes together. When you make it, pop back here and leave a rating or share how it turned out — I love hearing from you!